
How to set up a Facebook Ads account
To set up a Facebook Ads account, create a business portfolio at business.facebook.com, connect your Facebook Page (and Instagram account) to it, then create an ad account inside Business Manager with the correct time zone and currency, since neither can be changed later. Add a payment method under billing, then create a dataset (Meta Pixel) and install it on your website so ad results can be tracked. Verify the business and enable two-factor authentication to reduce the risk of restrictions.
Short answer To set up a Facebook Ads account, create a business portfolio at business.facebook.com, connect your Facebook Page (and Instagram account) to it, then create an ad account inside Business Manager with the correct time zone and currency, since neither can be changed later. Add a payment method under billing, then create a dataset (Meta Pixel) and install it on your website so ad results can be tracked. Verify the business and enable two-factor authentication to reduce the risk of restrictions. Facebook advertising runs through more moving parts than most owners expect: a business portfolio, a Facebook Page, an ad account, a payment method, and a Pixel (now called a dataset) that ties ad spend back to what happens on your website. Set these up in the right order and everything connects cleanly; set them up ad hoc and you end up with a personal ad account nobody controls, missing tracking, and assets scattered across staff logins. This guide covers the full setup in sequence, from creating a Meta Business Manager portfolio through to installing the Pixel and adding billing, plus the common mistakes that get New Zealand small business accounts restricted or left unmeasurable. It reflects the current Meta Business Suite interface, though Meta shuffles menu names often, so expect minor wording differences. Step 1: Create a Meta Business Manager portfolioEverything in Meta advertising hangs off a business portfolio, the container that holds your Pages, ad accounts, datasets, and people. Even a one-person business should run ads through a portfolio rather than a personal ad account, because it separates business assets from any individual's Facebook profile and makes it possible to grant and revoke access properly. Go to business.facebook.com and choose to create a business portfolio. Enter your legal business name exactly as customers know it, your own name, and a business email address you control. Meta emails a confirmation to that address from [email protected]; confirm it, then open Settings in Business Suite and complete your business information, including address and website. While you are in settings, visit the Security Centre. Two things matter here: turn on two-factor authentication (Meta requires it for business portfolios), and start business verification if the option is offered. Verified businesses are noticeably less likely to suffer random ad rejections and account restrictions. Add a second admin as a backup so a lost phone or locked profile does not lock the whole business out. 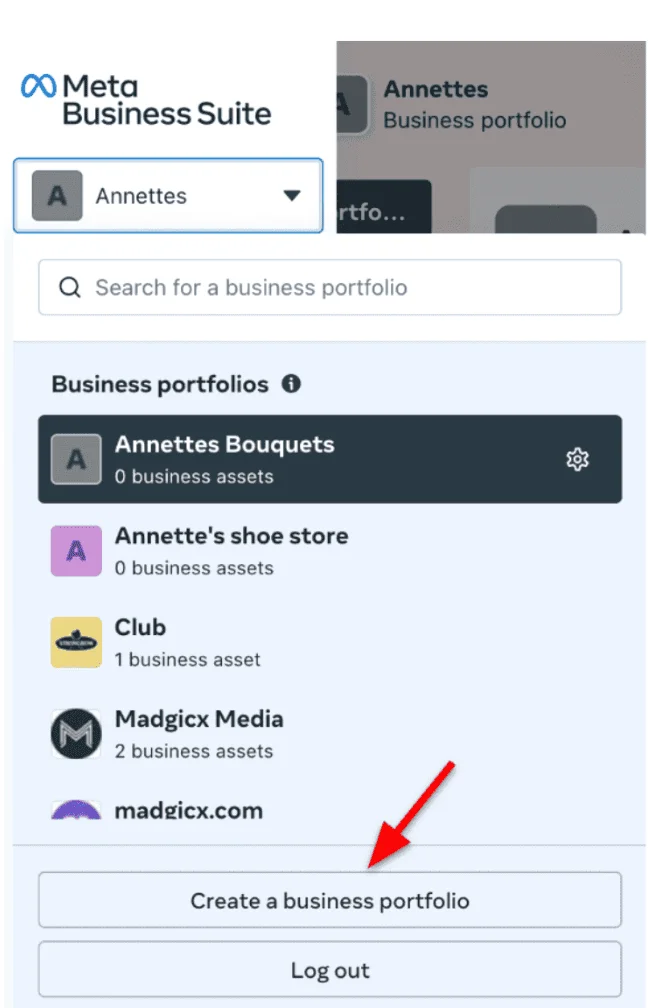 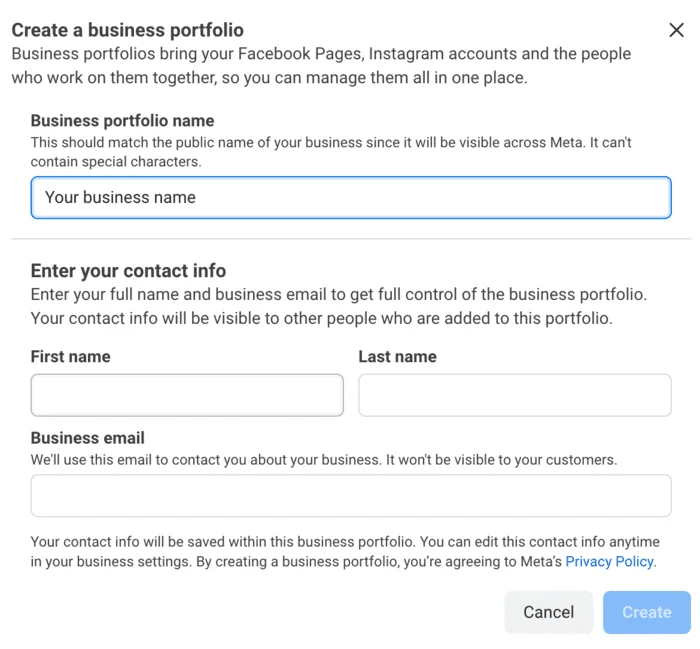 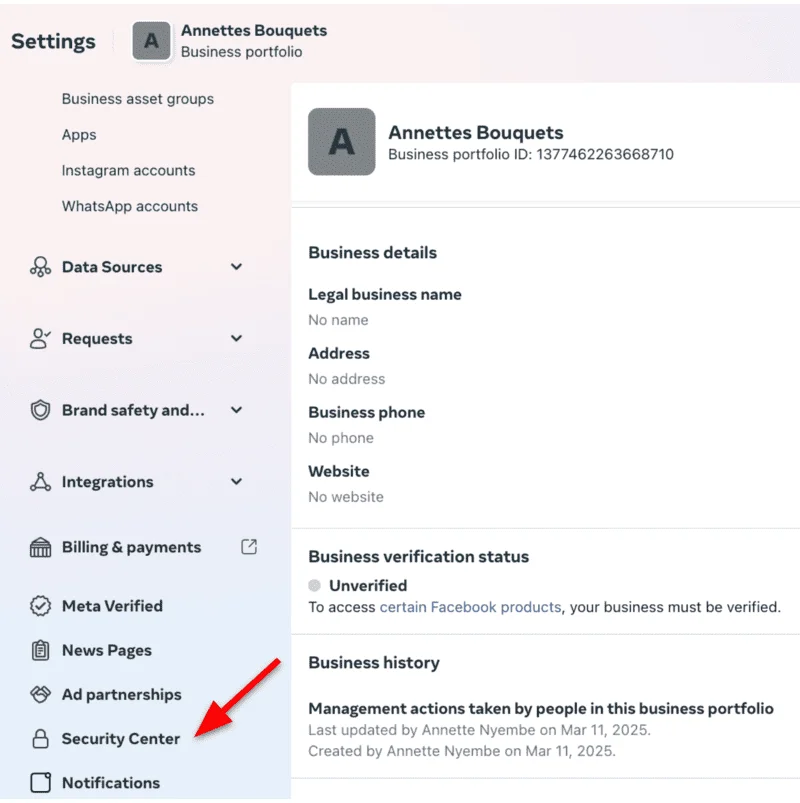 Add a second admin on day one. Lockouts from a single-admin portfolio are one of the most painful and slowest problems to fix with Meta support.
Step 2: Connect your Facebook Page (and Instagram) to the portfolioAds on Meta run from a Facebook Page identity, so the Page must live inside your portfolio before you can advertise. In Business Manager settings, open Pages under Accounts, click Add, and choose to add an existing Facebook Page, then select yours. If you do not have a Page yet, the same menu lets you create a new one; give it your business name, category, and contact details before moving on. If you plan to run ads on Instagram, connect your Instagram account the same way: find Instagram accounts in the left-hand menu, click Add, and log in with the account's credentials. Once connected, your ads can serve across Facebook and Instagram from the same campaigns, which is how most NZ small business budgets get the best reach. 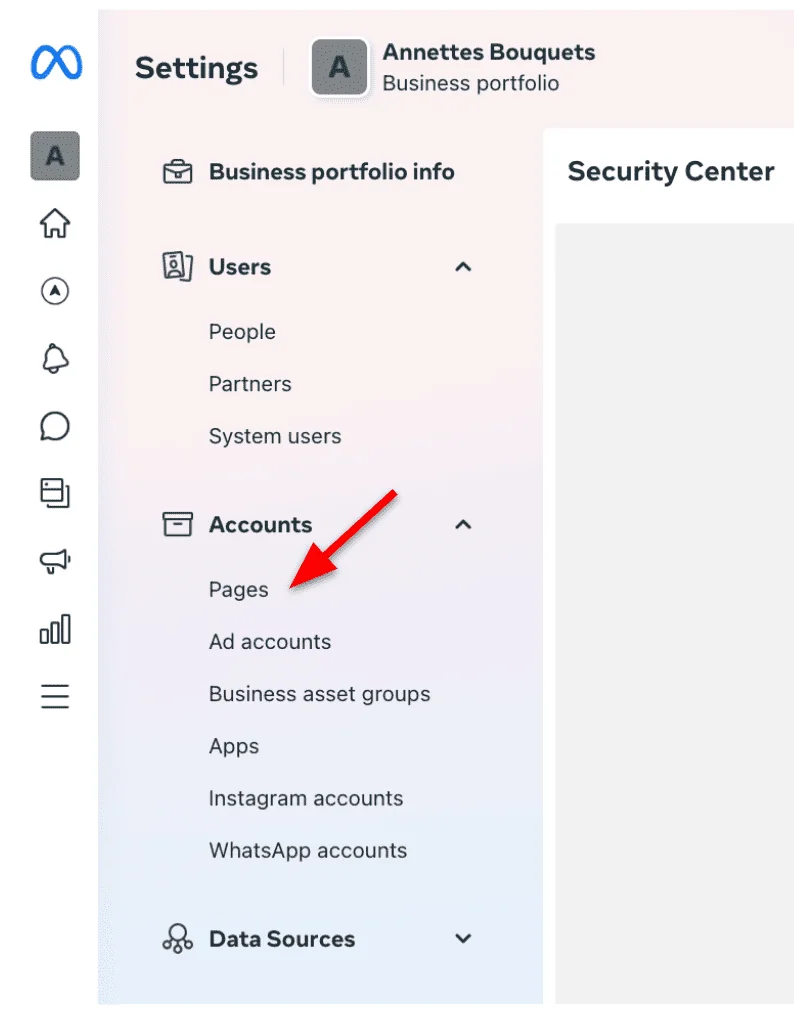 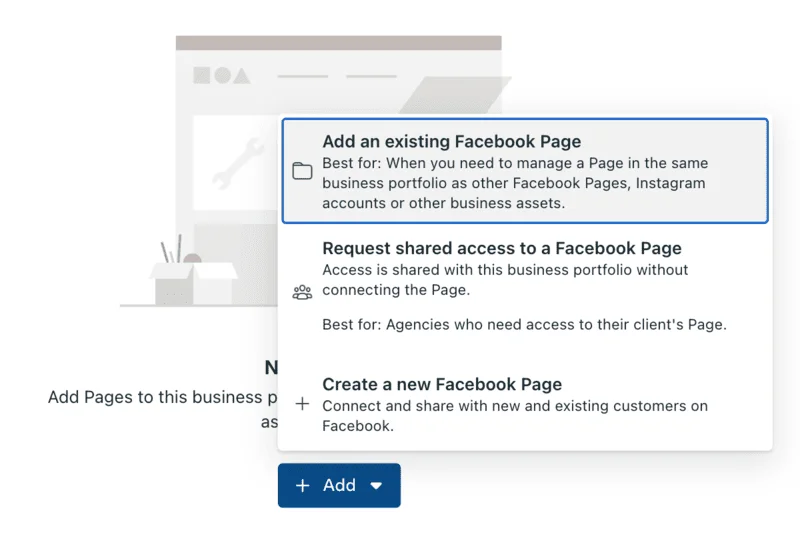
Step 3: Create the ad account, and get time zone and currency rightNow create the ad account itself. In business settings, go to Ad accounts under the Accounts section, click Add, and choose to create a new ad account. Name it after your business, then set the time zone and currency. For a New Zealand business that is the Auckland time zone and NZD. Stop and check those two settings before you continue, because they are permanent. An ad account's time zone and currency cannot be changed after creation; the only remedy is closing the account and starting a fresh one, which throws away spend history and learning. When asked who the account is for, select your own business, accept the terms, and create the account. One more constraint worth knowing: new business portfolios are limited to one ad account at first, with more unlocked over time as you spend and stay in good standing. That is fine for almost every SME, but it is another reason to set this first account up correctly. 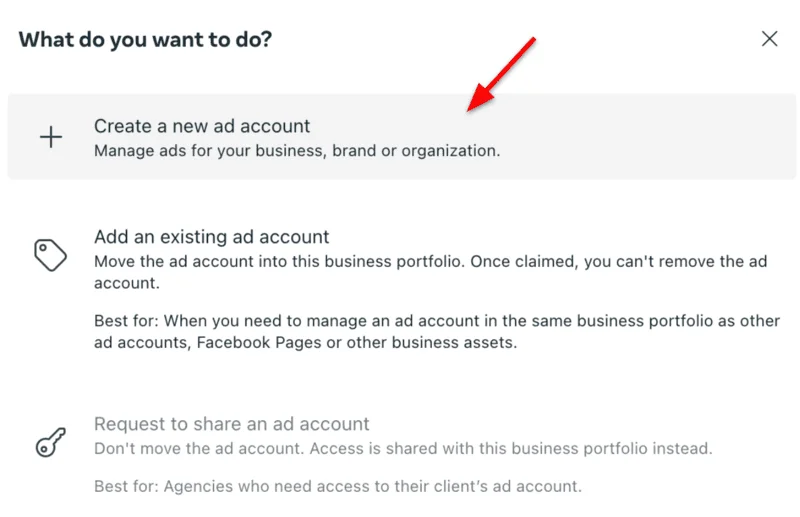 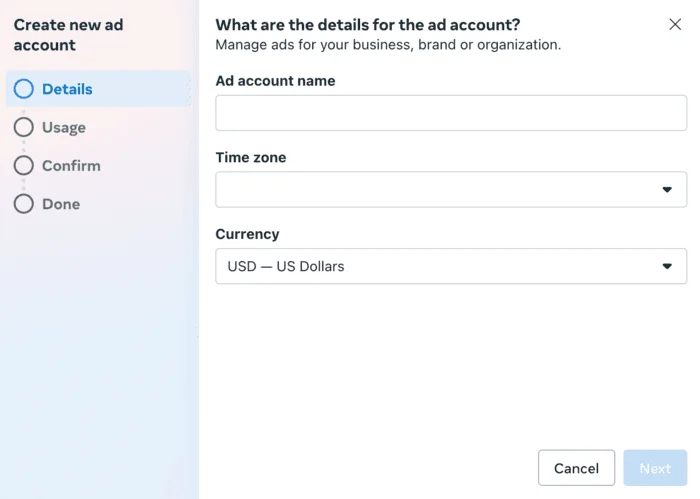 Double-check time zone and currency before clicking create. These are the only two settings on the account you can never change.
Step 4: Add a payment methodAn ad account with no payment method cannot deliver ads, so sort billing straight away. From business settings or Ads Manager, open Billing and payments, choose your ad account, and click Add payment method. Enter a business credit or debit card, confirm your billing country and GST details where prompted, and save. Meta bills automatically as you spend, charging when you hit a billing threshold or on your monthly billing date. It is worth setting an account spending limit while you are here, especially if you are new to the platform; it acts as a hard ceiling that stops a misconfigured campaign from spending beyond what you intended. Use a card attached to the business rather than a personal card, and keep it current. A failed payment pauses every campaign, and repeated failures can flag the account for review. 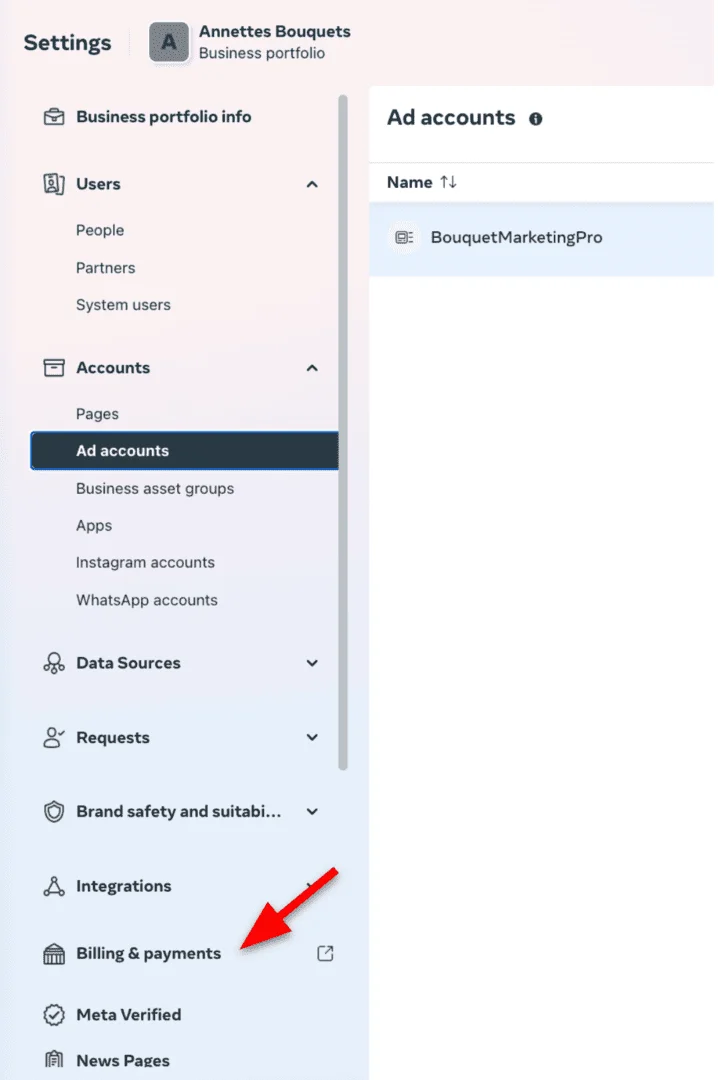 Set an account spending limit as soon as billing is added. It is the simplest safety net against a runaway campaign. Step 5: Set up the Meta Pixel and Conversions APIThe Pixel, which now lives inside what Meta calls a dataset, is what connects your ad spend to real outcomes on your website: enquiries, purchases, bookings. Without it, Meta can only optimise towards clicks and views, and you can only report on the same. Set it up before you launch anything. In business settings, open Data sources, then Datasets, and click Add to create a new dataset. Name it after your business and create it. From the dataset you can set up the Pixel on your website: either install the base code directly in your site header, add it through your website platform's built-in integration (Shopify, WordPress, Squarespace and most NZ site builders have one), or deploy it via Google Tag Manager. Alongside the browser Pixel, Meta strongly encourages the Conversions API, which sends events from your server or platform directly to Meta and recovers data lost to browser privacy controls and ad blockers. Most commerce platforms can enable it with a toggle in the same integration. Once installed, define the events that matter, such as Lead or Purchase, and test them with Meta's test events tool before spending. 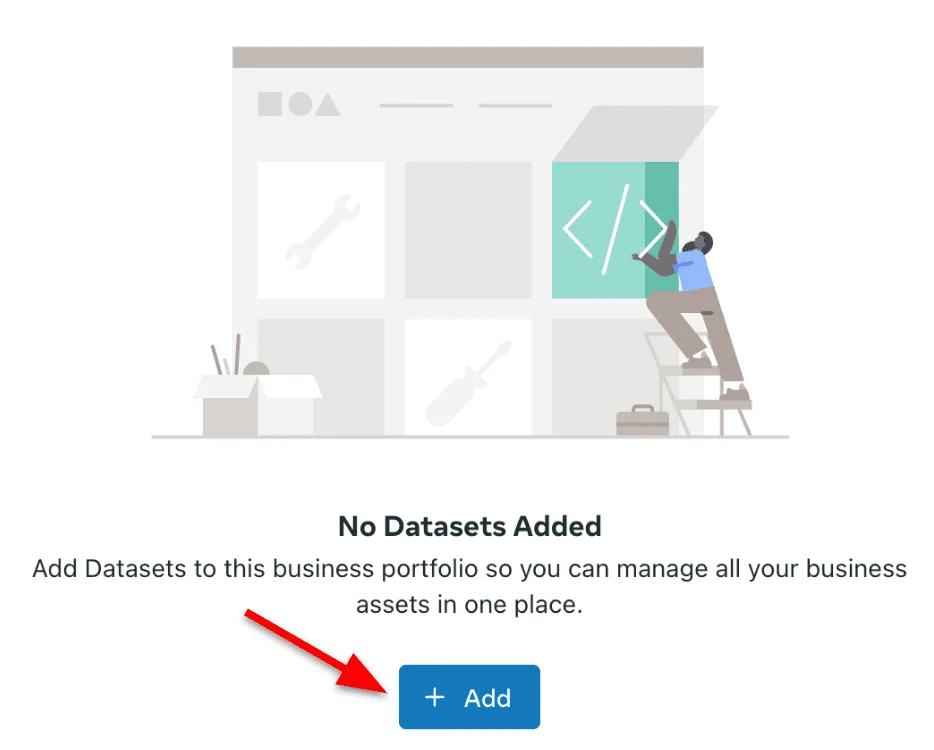 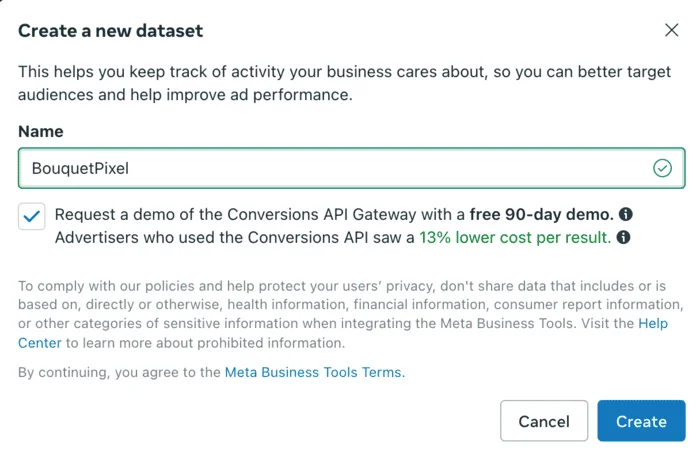 Fire a test lead or purchase yourself and watch it arrive in the events tool before launching. Unverified tracking is wasted budget.
How do you give an agency or partner access safely?If someone else will manage your campaigns, never hand over your login. Business Manager has a partner system built for exactly this: in business settings, open Partners, click Add, and choose to give a partner access to your assets. Enter the partner's business ID, which any legitimate agency will supply, and send the invitation. Once the partner accepts, assign them the specific assets they need, typically the ad account, the Page, and the dataset, with the appropriate level of control. The crucial point is that access flows from your portfolio outwards: you own everything, you can see everything they do, and you can revoke access in two clicks if the relationship ends. If an agency instead offers to run your ads from an account they own, walk away, because you would lose the account history, the Pixel data, and the audiences if you ever left. 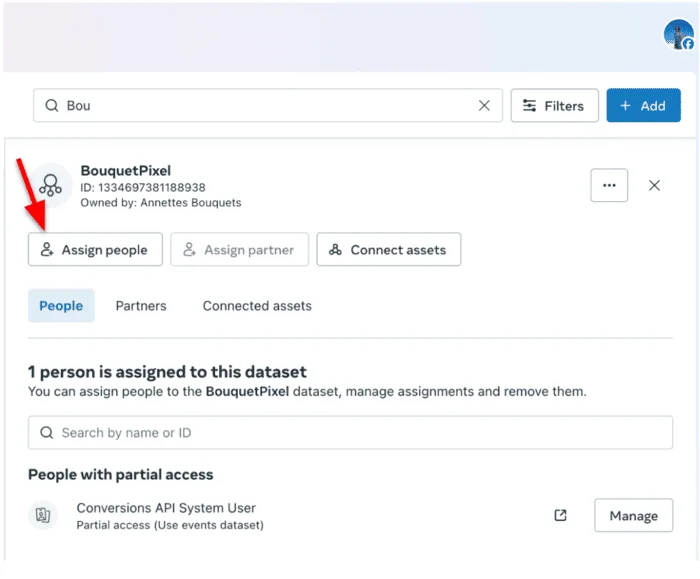
What are the most common Facebook Ads setup mistakes?The same handful of setup errors show up again and again when we audit Meta accounts for Auckland and wider New Zealand businesses. Most of them are invisible on day one and expensive by month three. The pattern behind nearly all of them is launching before the foundation is finished. The fix is equally simple: treat verification, two-factor authentication, correct account settings, and a tested Pixel as prerequisites, not follow-ups. An hour of setup discipline saves months of unmeasurable spend. If you have already been running ads without a Pixel, install it now anyway; it starts building audience and conversion data from the day it goes live.
Related servicesSources and further reading |

NEXT STEP
Want to know what your site should improve first?
Start with the three-step audit form. We will review your service pages, local SEO, technical setup, AI-search readiness, tracking, and enquiry path.
Start with an audit